


 Tiếng Việt
Proxy 101
What is a static IP address? Comparing static and dynamic IPs
Your IP address is a unique identifier that allows your device to connect to the internet. But not all IPs…
Table of contents

IPFighter app
Free app for all proxy solutions: Managing, Saving, Boosting, Being protected.
One effective solution to help you access restricted websites is by using a VPN. In this article, we will guide you on how to enable VPN on various browsers and devices, as well as how to troubleshoot common internet issues that may arise when using a VPN.
A VPN is a powerful tool that helps users protect their personal data while browsing the internet. It not only hides your real IP address but also encrypts your data, ensuring that only authorized parties can access it. This enhances privacy and security, making your online activities more secure and less vulnerable to cyber threats.
VPN, also known as Virtual Private Network, is a secure network that enhances online safety and privacy. When you use a VPN, your data is transmitted through an encrypted server, which replaces your IP address with the server’s IP address. This ensures that your online activities remain anonymous and cannot be tracked by anyone, including your Internet Service Provider (ISP).
Additionally, a VPN allows you to access geographically restricted websites or services. For instance, content on platforms like Netflix, Hulu, or other websites that may be unavailable in certain countries can be easily accessed using a VPN.
Using a VPN offers many benefits, ranging from enhanced security to unrestricted access to blocked content.
Android is one of the most popular mobile operating systems today. Using a VPN on your Android device not only enhances the security of your personal information but also allows you to access a wide range of content that may otherwise be restricted in your region.
Using a VPN on your Android device provides several significant benefits:
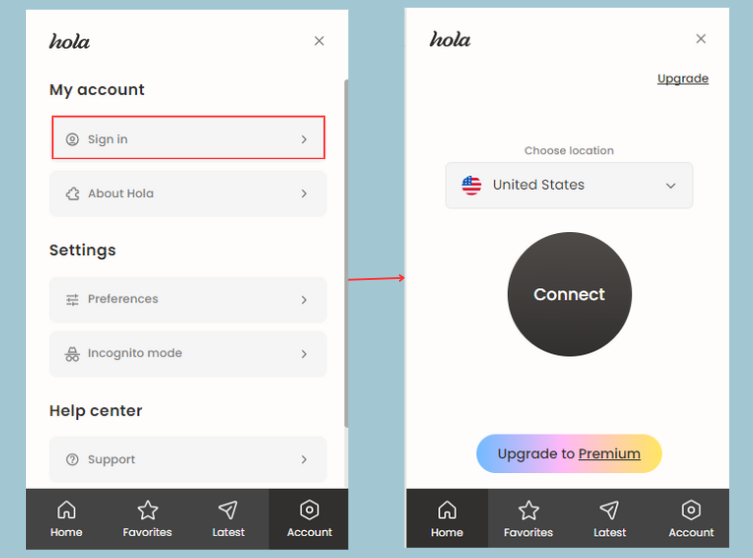
Use VPN applications
Way Enable VPN from Android app, refer to these steps:
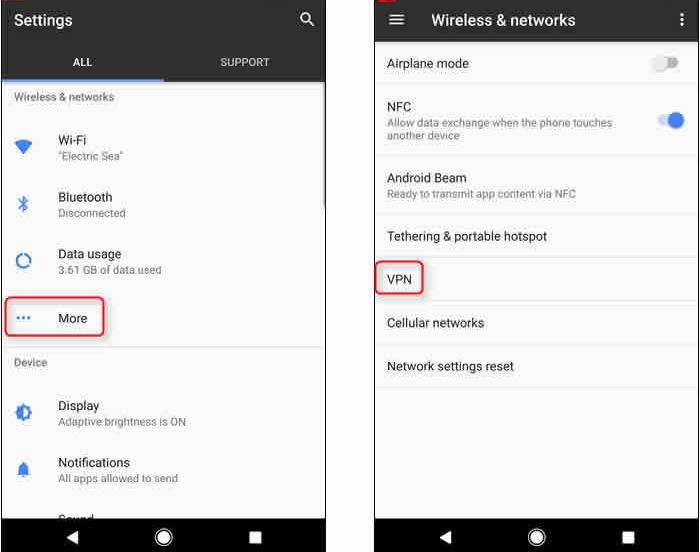
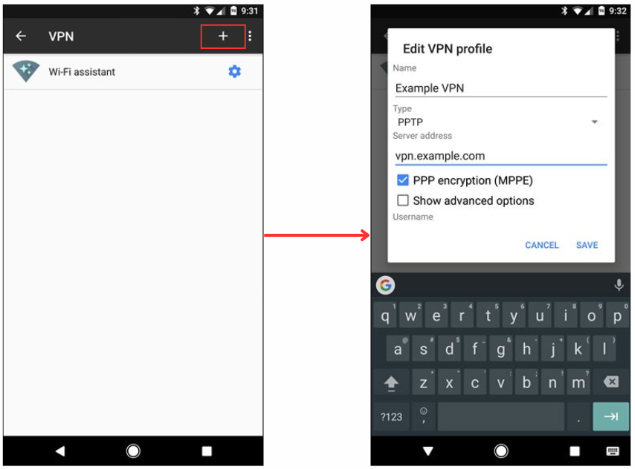
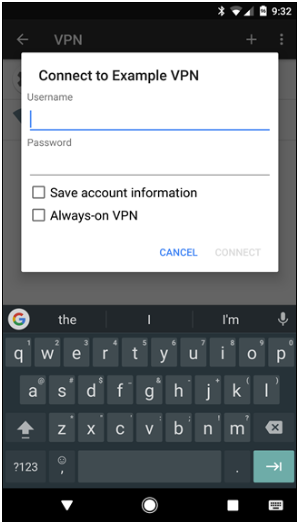
Connect to VPN from your Android phone’s settings
If you are an iPhone user, enabling a VPN is a straightforward process. Before we dive into the steps, let’s explore the benefits of using a VPN on your iPhone.
Similar to Android, using a VPN on an iPhone has many benefits. VPNs help secure your personal information and ensure that your online activities are untracked, access to streaming services, and more without geographical barriers.
Enable VPN via system settings
To enable a VPN on your iPhone using system settings, follow these steps:

Use a VPN app on iPhone
In addition to using system settings, you can also use VPN apps on iPhone. This is the simplest and most convenient way.
Computers are a common tool for both work and online entertainment. Enabling a VPN on your computer not only safeguards your personal data but also provides access to blocked content.
VPNs encrypt all of your data before it is transmitted to the internet, ensuring that your personal information remains secure and protected from theft. This is especially crucial when using unsecured networks, such as public Wi-Fi.
In addition to enhanced security, a VPN also prevents monitoring by ISPs and other organizations, helping you maintain your online privacy. Moreover, using a VPN on your computer allows you to bypass content restrictions. For instance, you can easily stream videos and movies, even if they are not available in your region.
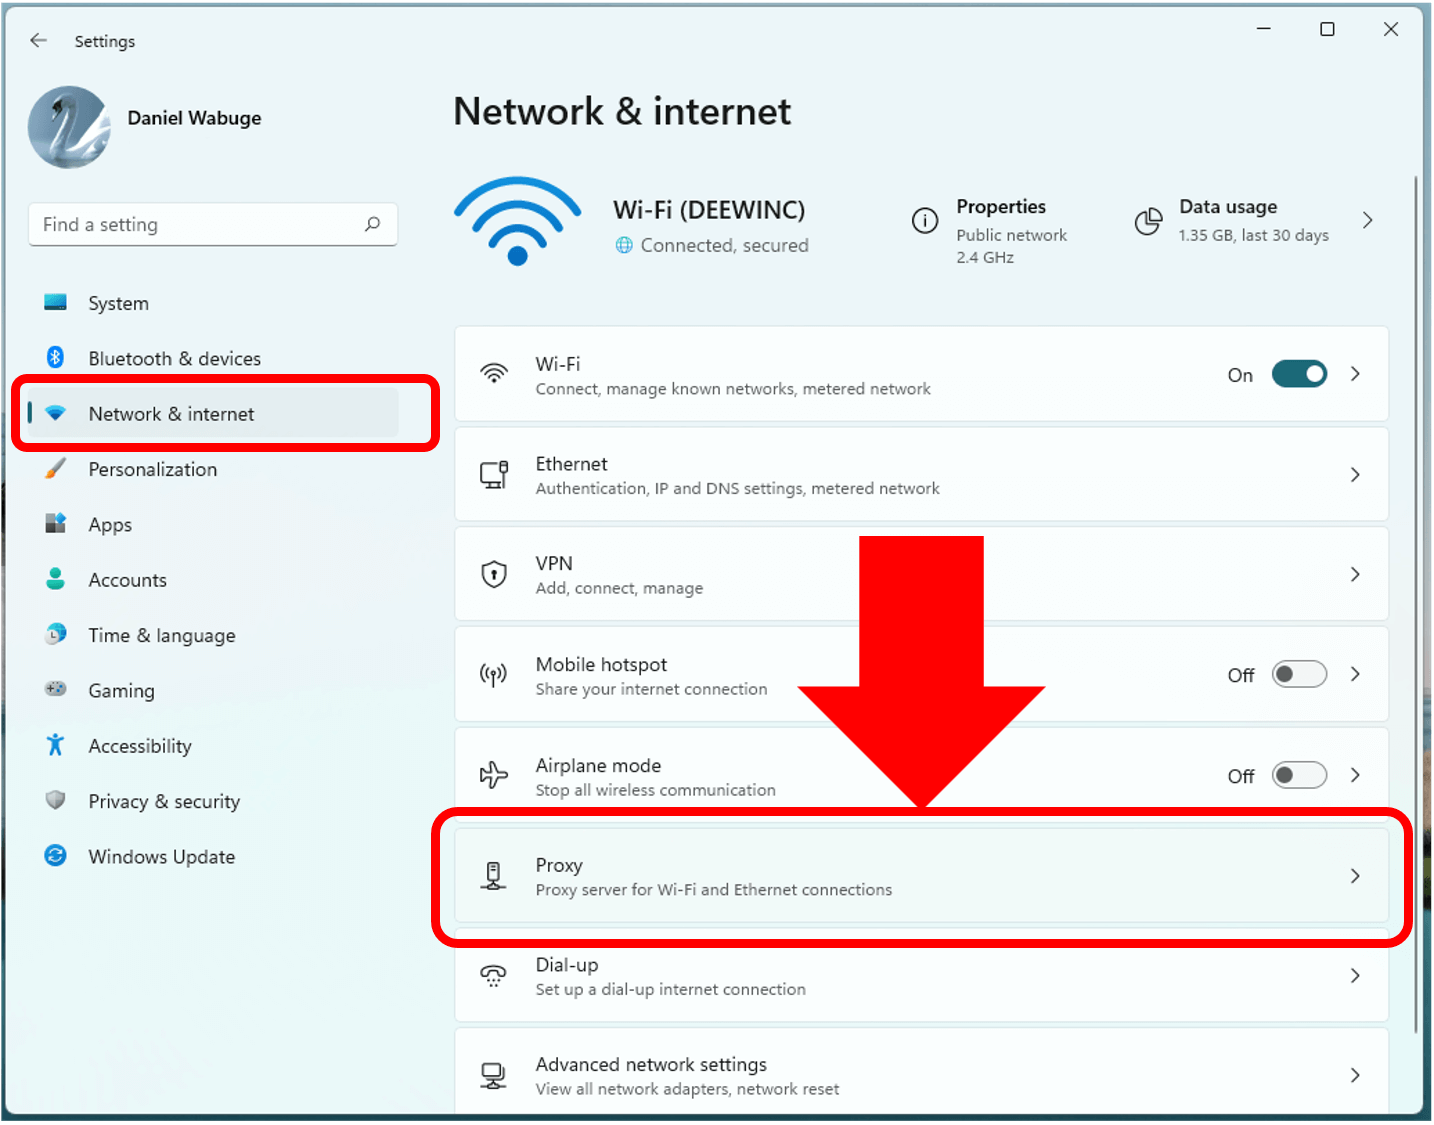
Enable VPN on Windows software
Enable VPN on Windows settings

Enabling VPN on Mac is similar to Windows:
The operations are similar to when you turn on VPN on Windows
Chrome is the most popular browser today, and enabling a VPN on Chrome provides numerous benefits to users.
One of the key advantages of using a VPN on Chrome is the ability to access geo-blocked content. Many websites and streaming services restrict their content based on the user’s geographic location. By enabling a VPN, you can change your IP address, allowing you to watch content from anywhere in the world.
This is especially useful if you waqqnt to stream content on platforms like Netflix, Hulu, or BBC iPlayer without being limited by location-based restrictions.
To enable VPN on Chrome, you can use the extension:
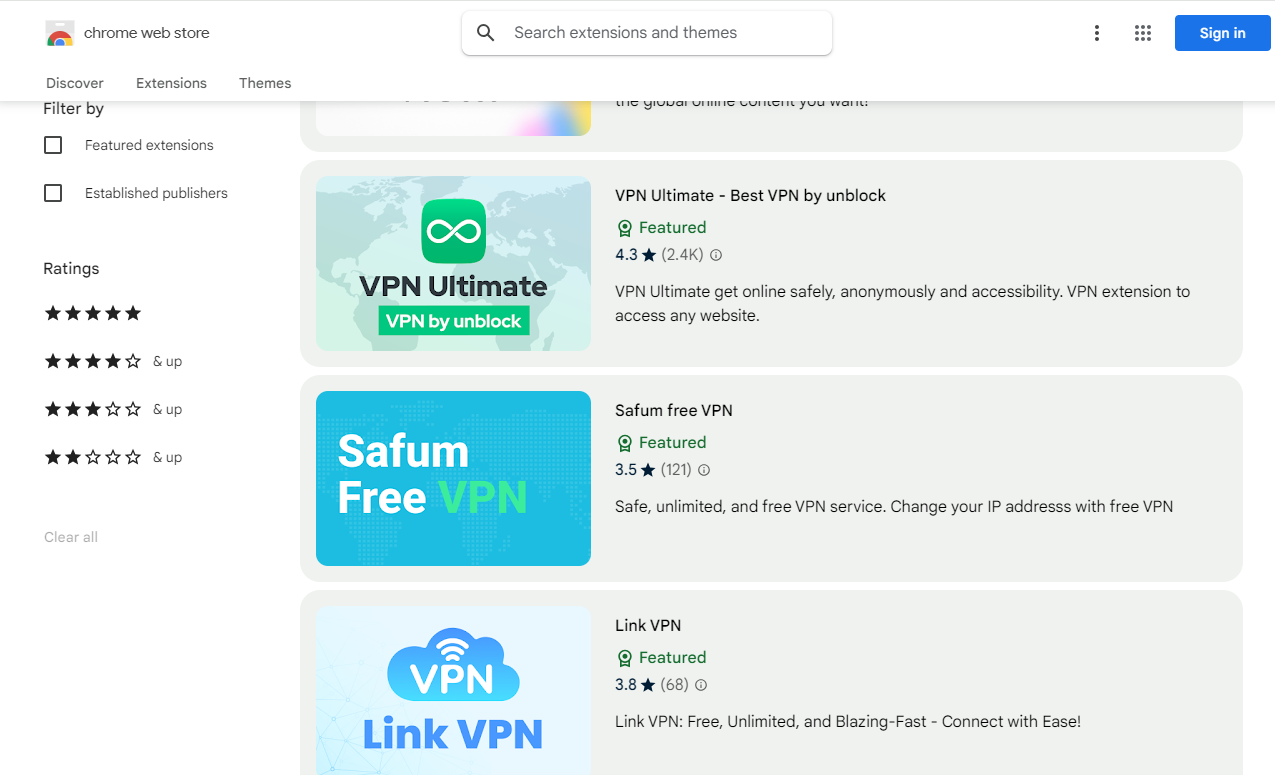
On the market today there are many reliable VPN utilities for Chrome such as:
After following the steps on how to enable VPN, you might encounter internet connection errors during the setup process, which can interrupt your browsing experience. To resolve this, consider checking the following factors:
A weak internet connection can disrupt network access, whether you are using a VPN or not. To identify the cause of the problem, try turning off the VPN and accessing the internet again.
If you are still unable to connect to the internet after disconnecting the VPN, the issue likely lies with your network connection. In this case, check your network settings or contact your internet service provider (ISP) for assistance.
Every website or domain, such as Google, is associated with a specific IP address. However, memorizing these numerical sequences is not practical for most people. This is where DNS (Domain Name System) comes in—it converts domain names into IP addresses, allowing users to easily access and browse the web without needing to remember complex numbers.
If you experience accessibility issues after enabling a VPN, it could be due to problems with the VPN server you’re connected to, or because certain countries restrict VPN usage. Most VPN services provide access to hundreds of servers, so switching to a different server might resolve the issue.
Selecting the appropriate protocol is an essential step when learning how to enable a VPN. The VPN protocol you choose can significantly impact the speed and stability of your connection. If you experience issues, try switching to a different protocol, such as OpenVPN, IKEv2, or PPTP, to improve performance and resolve errors.
The VPN connection port you are using can sometimes cause issues. Ensure that the port is open and not being blocked by a firewall. If needed, you can try enabling port forwarding for the VPN port in use to resolve connection problems effectively.
If you’re still experiencing internet connectivity issues with a VPN enabled, consider installing a proxy server. Proxy servers can help bypass certain restrictions and improve your access to the internet. Additionally, many VPN services offer support for proxy configuration, allowing you to combine the benefits of both tools for a more seamless online experience.
Even if you have successfully enabled a VPN, you might still encounter internet errors. In such cases, check the Kill Switch feature, an essential function in many VPNs. The Kill Switch automatically disables all internet traffic if the VPN connection is unexpectedly interrupted, ensuring your data remains secure and protected from exposure.
Older versions may result in internet connection errors. You need to update the versions for the fastest connection.
Finally, if you’re still having problems, check your device’s date and time settings. Sometimes, if the date and time are incorrect, this can cause problems connecting to the VPN server. Check your date and time are in the correct time zone and update automatically.
The growing popularity of VPNs has revolutionized how we access the internet, making it both safer and free from geographical restrictions. With the detailed instructions on how to enable VPN provided above, you can easily set up a VPN and effectively protect your personal information.
By following these steps, you can use a VPN to ensure the safety and security of your data while enjoying unrestricted access to online content. Stay secure and browse confidently with the power of VPN.
Recent
Your IP address is a unique identifier that allows your device to connect to the internet. But not all IPs…
Your iPhone’s IP address is essential for network connections, and knowing how to find it helps with troubleshooting, security, or…

IPv6 is the modern internet protocol designed to replace IPv4, offering a nearly limitless number of IP addresses. However, some…